1. Choose a good pattern for the dress
Making a dress starts with using a good pattern. You can easily find/buy/download this online, but you can also create a pattern yourself.
Patterns determine the specific sizes of the dress and the parts that make up the dress. Above all, choose a pattern that fits your figure (or the figure of the person who will wear it of course).
Tip: look in your own wardrobe for dresses whose print/colours are out of fashion but that are still modern in terms of fit and model. You probably won't wear this dress anymore. Take it apart and you immediately have a perfect pattern!
2. Take your measurements
If you have a standard pattern (purchased), then there are often also instructions for how to measure the measurements so that the dress will fit well.
It can be difficult when you make a dress for yourself to take your own measurements. Ask someone to help you take your measurements.
Tip: you will (in step 5) cut the fabric based on your measurements. Always use the rule of thumb to measure twice and cut once. Once cut, there is no way back!
3. Select the appropriate fabric type for your dress
You now know which dress you are going to make, have a pattern and the right sizes. But without dust, no dress! Choosing the right substance determines the end result. Would you like advice about this? Call or chat us, we are happy to think along with you!
Tips for choosing a fabric
- Material
Every fabric has unique properties. For example, cotton is easy to wash and very durable, polyester retains its colour very well (also in the sun), silk is a fabric that is very lightweight and comfortable, and polyamide is very strong and crease-free. As you can see the choice is very large and you have to think about this carefully. Choose a fabric that matches the look of the dress, but also pay attention to comfort and washing instructions.
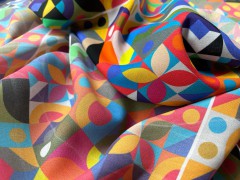
- Colour and design
Look carefully at which colour suits you. Not every colour or design matches your own style. Now you can opt for standard fabrics with a standard design that you like. But you can also design it yourself and have it printed on fabric. It sounds difficult but it is not.
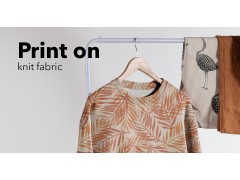
- Create your own design on fabric
Do you create a design yourself? Make sure that the relationship between your design and the dress is correct. The beauty of your own design is that almost anything is possible. From a pattern, to colour gradient, detailed drawings or even photographic images. Always buy a little more fabric than you actually need so that you always have enough. When printing (due to the shrinking of dust), the actual size may deviate slightly.
Tip: make sure your fabric is thick enough so that you don't need an under dress or two layers.
4. Wash the fabric
Before you cut and sew, it is very important to remove all creases and stains. The fabric can always shrink a little during the first wash. If you order the fabric on our webshop, this is not the case. We already wash the fabric in our production process, so that almost all shrinkage is eliminated.
Tip: look carefully at the washing instructions for the selected fabric. It sounds logical, but a wrong temperature/position can be disastrous.
5. Cut the fabric to size
Place the fabric on a flat surface and ensure that all creases are out. Fold the fabric in half once, so that you immediately have two identical parts for the front and back of the dress when cutting.
Do you use a fabric with a photo print? Then you have more freedom to move around with the pattern, so that you get a nice image on the front and back. If you want a dress with sleeves, cut it out separately and sew it on later.
Make sure you always add about 2.5 centimetres of space on the side of the fabric when cutting for the hem. This is especially important if you have used your own dress as a pattern because with a pattern this space is often included and not with a personal dress as a pattern.
Tip: if you want to be sure of a symmetrical shape, fold the fabric in half lengthwise and cut out half of a pattern from the folded side. Then unfold it and you have a nice symmetrical shape.
6. Start sewing
Most of the patterns you purchase also include sewing instructions. It explains exactly how to sew the dress. If you have no instruction, here are some tips:
Make sure that the parts (front and back) are neatly on top of each other and pin it. Be very precise in this, especially with a pattern that should fit nicely together.
First sew the sides together with a zigzag stitch. Turn the dress inside out and fold about an inch above and below the edge. Flatten it then with an iron, the edge stays in place to sew the hem neatly. For the hems you can use a straight stitch, because it looks nicer.
7. Show it off!
As you can see, making your own dress is not difficult if you just follow the right steps. It is time to wear your self-made dress with pride! Let those compliments stream in.
There is nothing better than people who ask "where did you get that dress" and that you can tell that you made it yourself.
Do you want to get started right away? Then take a look at our range of fabrics or create your own design directly in our design generator.